Setting up your system
This page provides step-by-step instructions to set up your system for flashing your Car Thing using a legacy flashing method, from tool preparation to software configuration for a successful flashing process.
Installing Prerequisite Programs
Flashing the CarThing requires additional programs and drivers.
Git
Install Git on your system here.
Install Git on your system using the commad ‘git —versions’
Install Git on your system using the command ‘sudo apt install git’
Python
Python is required to run the Car Thing flasher program (superbird).
Python no longer needs to be manually installed for the latest Windows flashing process!
Install Homebrew and python will be installed with it.
Run the following command:
sudo apt-ghet install python3Drivers
To connect to the Car Thing, it is necessary to install specific drivers that are compatible with the device.
Complete the following steps to connect the Car Thing to your computer and install the proper USB Drivers.
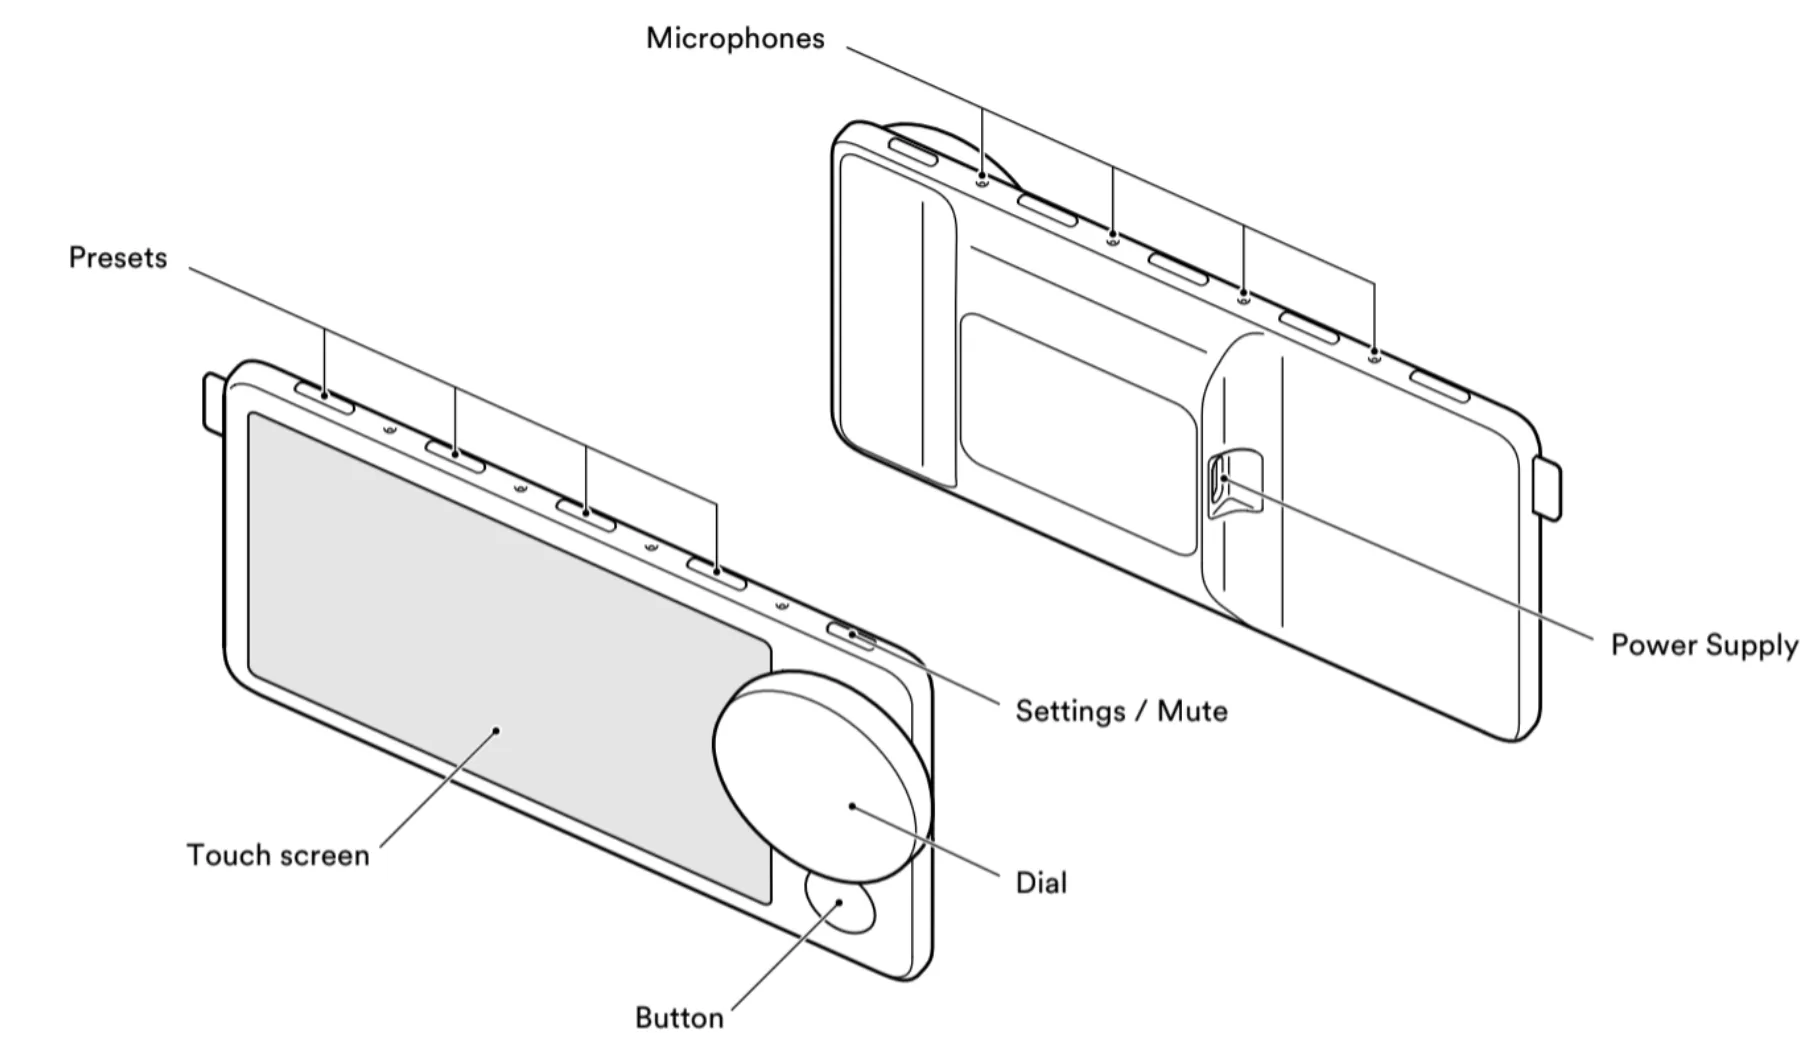
1.) Plug in a USB-C-to-C or USB-A-to-C cable into the Car Thing Power Supply Port.
2.) While holding top preset buttons 1 and 4, plug the USB into the computer. This will put the device into USB burning mode.

3.) Install Zadig from here. This tool is used to modify the computer USB drivers.
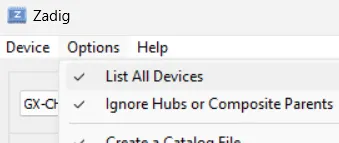
4.) After the driver is installed select options, then “list all devices”.

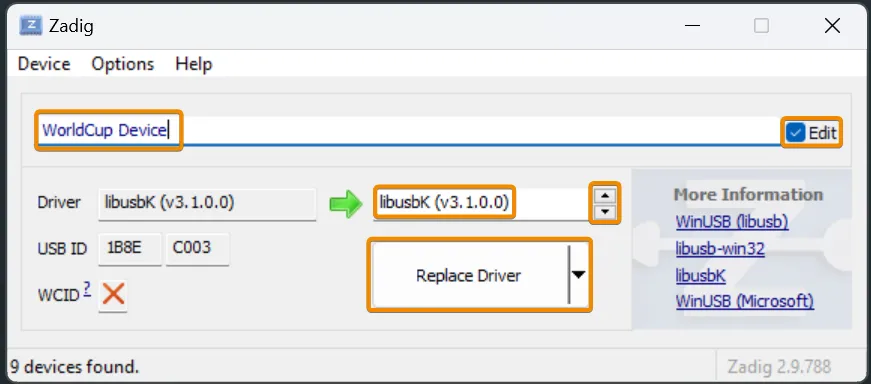
5.) Within the drop-down change the select “GX-CHIP”. Select the “Edit” checkbox and replace the name with “WorldCup Device”.
6.) In the “Driver” field select the up or down arrows to cycle through the list of drivers. Press the up arrow until you see the option “libusbK”.
7.) Select “Replace Driver” and wait for it to finish. This can take several minutes.

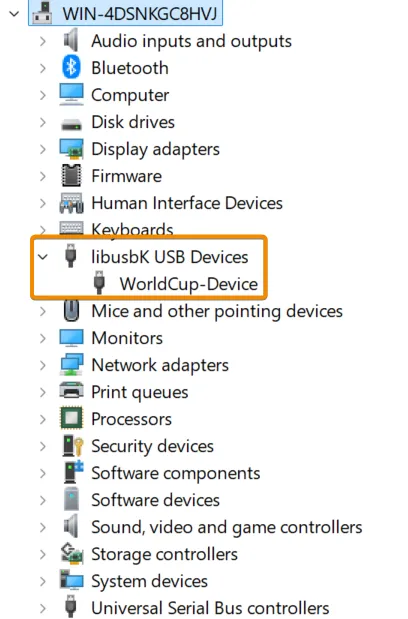
To verify the driver has changed successfully, navigate to the windows device manager. You should find a drop down titled “libuse-win32 devices” and a device named “WorldCup Device”

brew install libusbWith your package manager of choice install the packages
libusb libusb-compat